Test node actions
Select one or more Test Nodes in the list, then open the ⋮ menu at the top right of the Test Nodes page. The menu offers Agent Installer, Assign Projects, Check Status, Restart Agent and Delete. Agent Installer, Restart Agent and Delete are for Admin users.
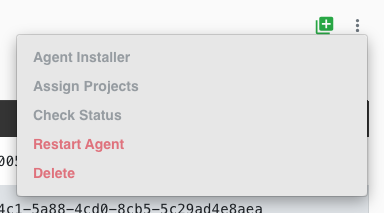
Agent Installer
The Agent Installer action gives you a single, ready-to-run command that installs and connects the Agent on the Test Node machine — whether it is a Mac mini or a Mini-PC. Instead of copying a configuration file to the machine and setting it up by hand, the command takes care of all the required setup automatically.
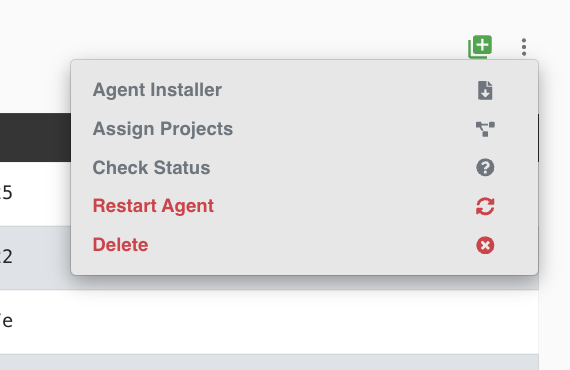
How to use it
- Select exactly one Test Node from the list.
- In the top-right corner of the Test Nodes page, open the Actions (three-dot) menu.
- Click Agent Installer.
- The Agent Installation modal shows a command. Copy it (copy icon) and run it on the Test Node machine's terminal (Mac mini or Mini-PC).
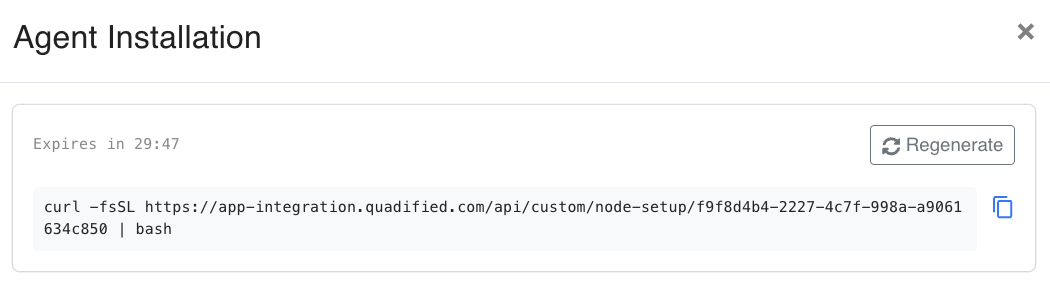
The command has the following format:
Running this command installs the Agent and its services and connects the Test Node, without any configuration files. The phones still need their own preparation; see Phone preparation. See What the installer does for the installation steps.
Note
The command works once and expires 30 minutes after it was created. The modal shows the time left (for example Expires in 29:47), in red when less than five minutes remain. When it has expired, the modal reads "Command expired — click Regenerate to get a new one." Click Regenerate to get a fresh command; the previous command stops working.
Warning
Run the command only on the machine that belongs to this Test Node. Running the command gives the node a new credential, so running a node's command on another machine disconnects the original one.
For the full client setup walkthrough, see Mac Agent Installation.
Assign Projects
The purpose of "Assign Projects" is to include the selected test nodes in projects.
The Assign to Project window lists every project with a checkbox:
- To assign the selected item to a project, tick the project and click the blue button.
- To remove it from a project, untick the project and click Save.
- To create a new project, type its name in Search or Create and click the green button.
- Select All ticks every project in the list.
You can assign several selected items at once, but only when they are currently in the same projects; otherwise the action is disabled. Projects are renamed and deleted from the Projects filter in the top bar.

Check Status
| Parameter | Value |
|---|---|
 |
User must click on this button to retrieve status |
 |
Test Node is ready for test executions |
 |
Test Node is not ready for tests. Please check TMS Device Agent and make sure connection towards AWS is in status Connected! |
Restart Agent
Restart Agent restarts the Agent software on the selected Test Nodes (Admin only). You can select several nodes at once.
- Select the Test Nodes and choose Restart Agent in the ⋮ menu.
- Confirm with Restart in the Restart Agent dialog ("Are you sure you wish to restart Agent …?").
- Before restarting, TEO checks each node: "Checking for the Status…", then "Checking for Running Executions". A node that is not available, or that is running a Test Execution (
Test Node "X" is blocked by Test Execution "Y".), is not restarted. When the checks pass, "Everything is Fine. Restart Operation is Starting." appears.
| Parameter | Value |
|---|---|
 |
Rebooting is in progress |
 |
Reboot successful |
If the restart fails, the node's status icon shows !.
Quadified support can also update the Agent to the latest version from this menu (Update Agent, visible to Quadified staff only).
Delete Test Node
The Delete Test Node feature allows you to remove a test node from your system (Admin only). This is useful for managing and cleaning up your test node repository.
How to Use the Delete Feature
To delete a test node, follow these steps:
- Select the Test Node to Delete: Choose the test node that you want to delete from your list.
- Open the Action Dropdown: Click on the ⋮ menu.
- Select "Delete": Choose the "Delete" option and confirm in the Delete Test Node dialog.

Handling Test Node in Mobile Id
If Mobile IDs are still assigned to the test node, it cannot be deleted. An error message with the reason appears instead. Move the Mobile IDs to another node, or delete them, first.
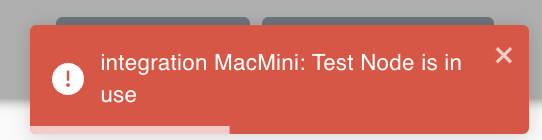
This ensures that you do not accidentally delete test nodes that are actively being used by Mobile IDs, maintaining the integrity of your test plans.