Mobile ID actions
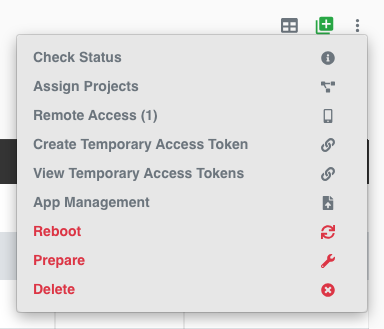
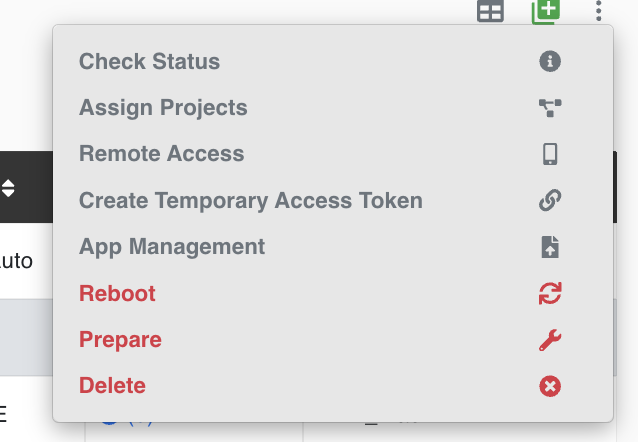
Select one or more Mobile IDs, then open the ⋮ menu at the top right of the list. It has nine items: Check Status, Assign Projects, Remote Access (n), Create Temporary Access Token, View Temporary Access Tokens, App Management, Reboot, Prepare and Delete. An item is disabled when it does not apply to the selection.
Check Status
Select one or more devices and choose Check Status. The Mobile Device Status window shows one block per device ("Collecting Information..." while it loads). Below are the examples for an active and an inactive device.
Active Device
For a connected device, the block shows its state (
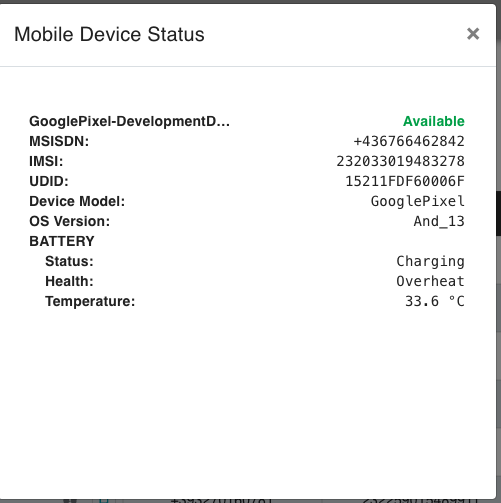
Example for an active device:
- Device State: Available
- MSISDN: +447700900123
- IMSI: 234150000000001
- UDID: 00000000-0000000000000000
- Device Model: GooglePixel
- OS Version: And_16
- Battery:
- Level: 85%
- Status: Charging
- Health: Good
- Temperature: 33.6°C
Inactive Device
When the device is inactive or not connected, the block simply indicates that the device is not connected.
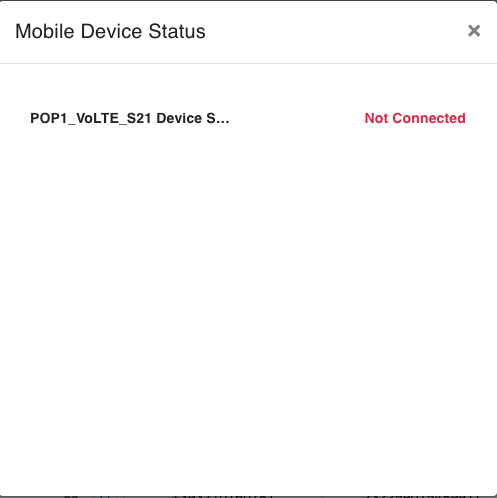
Details shown for an inactive device:
- Device State: Not Connected
Assign Projects
The purpose of "Assign Projects" is to include the selected Mobile IDs in projects.
The Assign to Project window lists every project with a checkbox:
- To assign the selected item to a project, tick the project and click the blue button.
- To remove it from a project, untick the project and click Save.
- To create a new project, type its name in Search or Create and click the green button.
- Select All ticks every project in the list.
You can assign several selected items at once, but only when they are currently in the same projects; otherwise the action is disabled. Projects are renamed and deleted from the Projects filter in the top bar.

Remote Mobile Access
Remote Access in the Mobile IDs actions menu opens the selected devices in Remote Mobile Access.
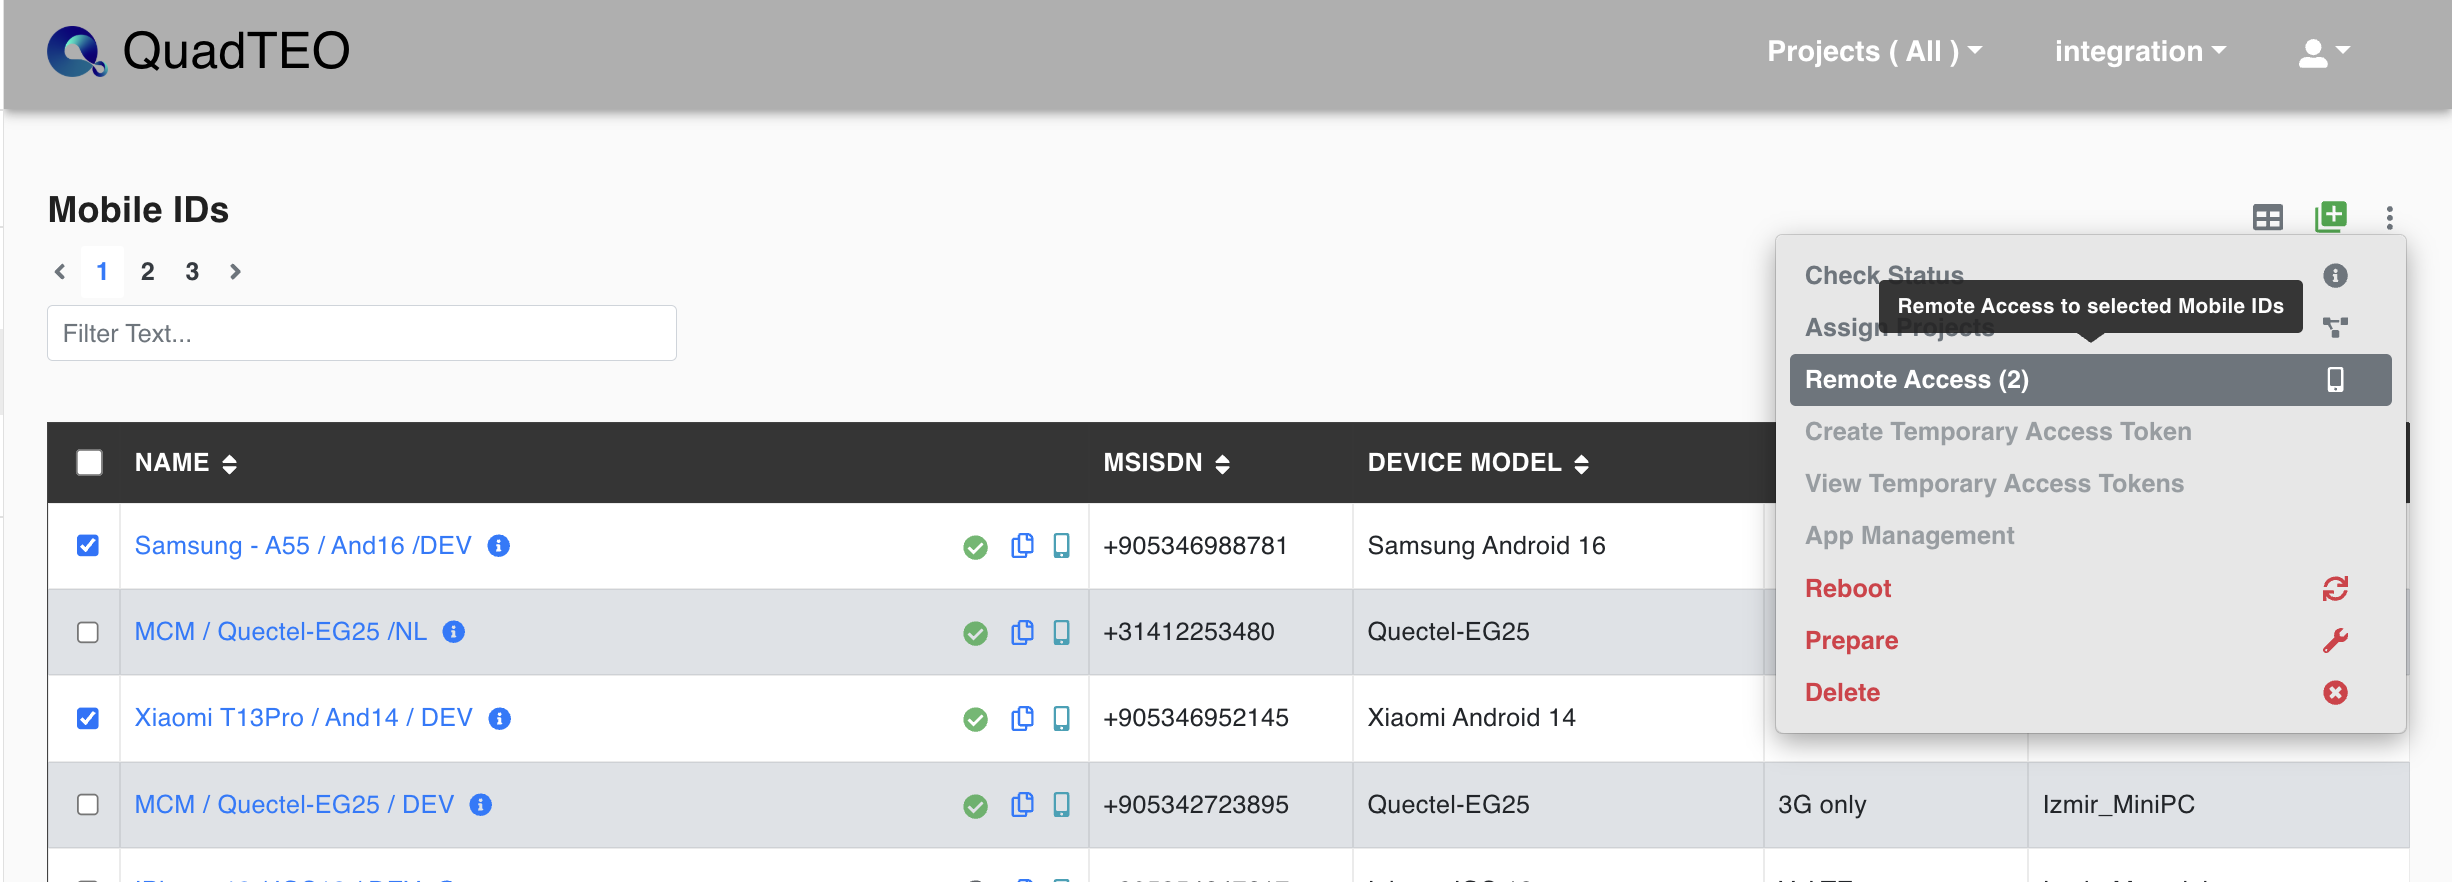
Tick the checkbox of every device you want to work with, then open the actions menu and choose Remote Access. The menu item shows how many devices are selected — Remote Access (2) for two — and they all open together in one session, side by side.
Once the session is open you can drive each device's screen, read its live status, stream its logs, and send AT commands to MCM modems. See Remote Mobile Access for the full page, and MCM Remote Access for the modem console.
Create Temporary Access Token
A temporary access token is a link that gives someone access to one device through Remote Mobile Access for a limited time, without a TEO account. Only Admin users can create tokens. Standard users also see the menu item, but the platform refuses their request.
Creating a Temporary Access Token
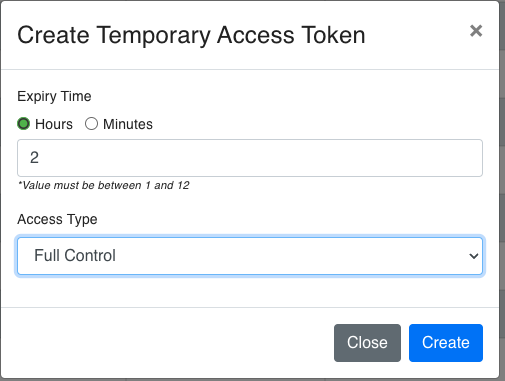
- Select exactly one Mobile ID and choose Create Temporary Access Token in the ⋮ menu.
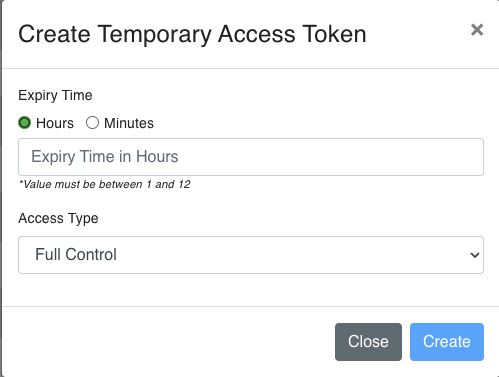
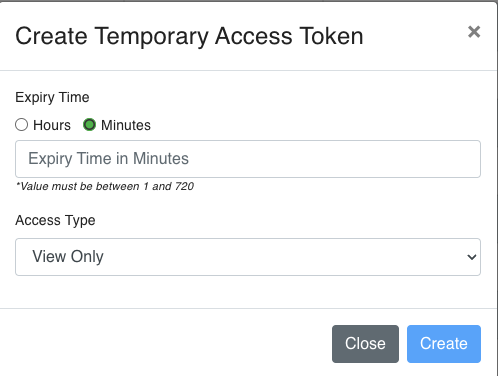
- Set the Expiry Time: choose Hours (1 to 12) or Minutes (1 to 720) and enter the value.
- Choose the Access Type: Full Control (the recipient can use the device) or View Only (the recipient can only watch the screen).
- Click Create. A message confirms the token; open it from View Temporary Access Tokens to copy the link.
You can also create a link from an open Remote Mobile Access session: click the paperclip (Create a temporary access link) in the device card header.
What the recipient sees
The link opens Remote Access · Temporary Access in the browser, with a countdown ("Access valid for HH:MM:SS"). When the time is up, the page shows "Access expired". With View Only, the controls are hidden (an MCM console shows "View only mode"). A link that is wrong or was deleted shows "This temporary access link is invalid…".
View Temporary Access Tokens 
Admin users can see every token: choose View Temporary Access Tokens in the ⋮ menu with no device selected (all tokens) or one device selected (that device's tokens). The Temporary Access Tokens window lists Mobile Device, Test Node, Expires At and Access Type. In Actions, copy the link, see who created the token and when (ⓘ), or delete the token to end the access immediately.
App Management
The App Management action is used to upload an APK file and install it on the selected mobile device. It is enabled when exactly one Android device is selected; it is disabled for iPhones and MCM modems.
Install an APK
- Open Using the TEO Web UI -> Mobile ID's.
- Select the Android device where the APK should be installed.
- Open the ⋮ menu.
- Select App Management.
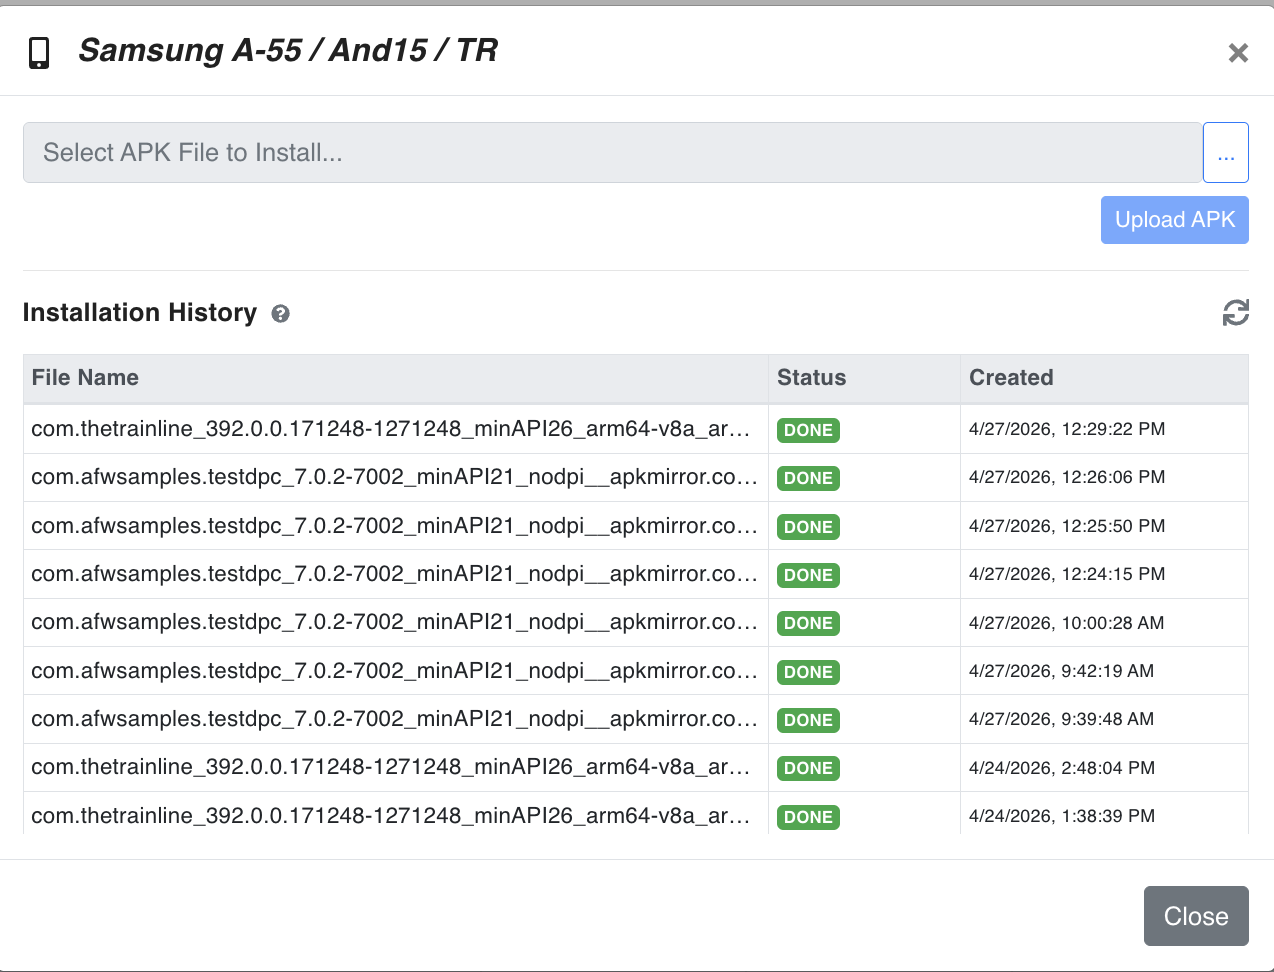
- In the App Management dialog, click Select APK File to Install... and choose the
.apkfile from your computer. - Click Upload APK to start the installation on the selected phone. A progress bar shows the upload.
Installation History
The dialog shows the APK installation attempts of the past 24 hours for the selected device ("History is for the past 24 hours"), and updates itself every 5 seconds. When there are none, it reads "No installation jobs found."
| Column | Description |
|---|---|
| File Name | The uploaded APK file name. |
| Status | PENDING (waiting for the Test Node), IN_PROGRESS, DONE (the APK was installed successfully) or FAILED. |
| Created | The date and time when the APK installation request was created. |
Use the refresh icon to update the installation history after uploading a new APK.
Reboot
Select the devices, choose Reboot in the ⋮ menu and confirm with Reboot Device in the Reboot Confirmation dialog. A spinner on the row shows the reboot in progress.
| Parameter | Value |
|---|---|
 |
Rebooting is in progress |
 |
Reboot successful |
Prepare 
The Prepare action automatically applies the required device settings so a newly connected phone can be used in TEO.
Android only
Prepare is available for Android phones (Samsung, Xiaomi and Google Pixel). It is disabled for iPhones and MCM modems: set up an iPhone by hand with iOS Settings. The steps below up to "Wait for the Mobile ID" apply to iPhones too.
Follow this order when you are connecting a phone to the Test Node for the first time.
First-time connection order
1) Prepare the computer and cable
- Make sure the Test Node computer is powered on and online in TEO.
- Use a data-capable USB cable, not a charge-only cable.
- If a USB hub is used, connect the phone through the hub that belongs to the Test Node.
- Keep the phone physically near you; several confirmation prompts must be accepted on the phone screen.
2) Connect the phone
- Unlock the phone.
- Connect the phone to the Test Node computer by USB.
- Keep the phone unlocked during setup.
- If the phone asks whether to trust or allow the computer, accept the prompt.
For iPhone, tap Trust in the Trust This Computer? alert (and enter the passcode, if one is still set; the passcode must be turned off for testing). If you tapped Don't Trust by mistake, go to Settings > General > Transfer or Reset iPhone > Reset > Reset Location & Privacy and reconnect the cable.
For Android, the Allow USB debugging prompt may appear later, after USB debugging is enabled. When it appears, select Always allow from this computer and tap OK.
3) Enable developer access
Use the guide for the device model:
- Samsung: Enable Developer Options
- Xiaomi: Enable Developer Options
- Pixel: Enable Developer Options
- iOS: Enable Developer Mode
For Xiaomi, insert an active SIM card and sign in with a Xiaomi account before enabling USB debugging (Security settings).
For iOS, Developer Mode appears in Settings only after the iPhone has been paired with the Mac (connected, unlocked and trusted).
4) Confirm the required developer settings
After Developer Options or Developer Mode is available, verify the required settings:
- Samsung: Check if Developer Options is Enabled
- Xiaomi: Check if Developer Options is Enabled
- Pixel: Check if Developer Options is Enabled
- iOS: Check that Developer Mode is enabled
5) Wait for the Mobile ID
- Open the TEO Web UI.
- Go to Mobile ID's.
- Wait until the connected phone appears in the list.
- If it does not appear, unlock the phone, reconnect the cable, and check the trust or USB debugging prompt again.
- Complete the Mobile ID: click its name to open it, and enter a descriptive name and the real MSISDN, National Format, IMSI and IMEI. IMSI and IMEI start with random placeholder values, and tests fail until they are replaced. See Edit a Mobile ID.
6) Run Prepare from the Web UI (Android)
- Go to Mobile ID's.
- Select the phone.
- Open the ⋮ menu → Prepare, and confirm with Prepare Device in the Preparation Confirmation dialog. A spinner on the row shows that Prepare is running.
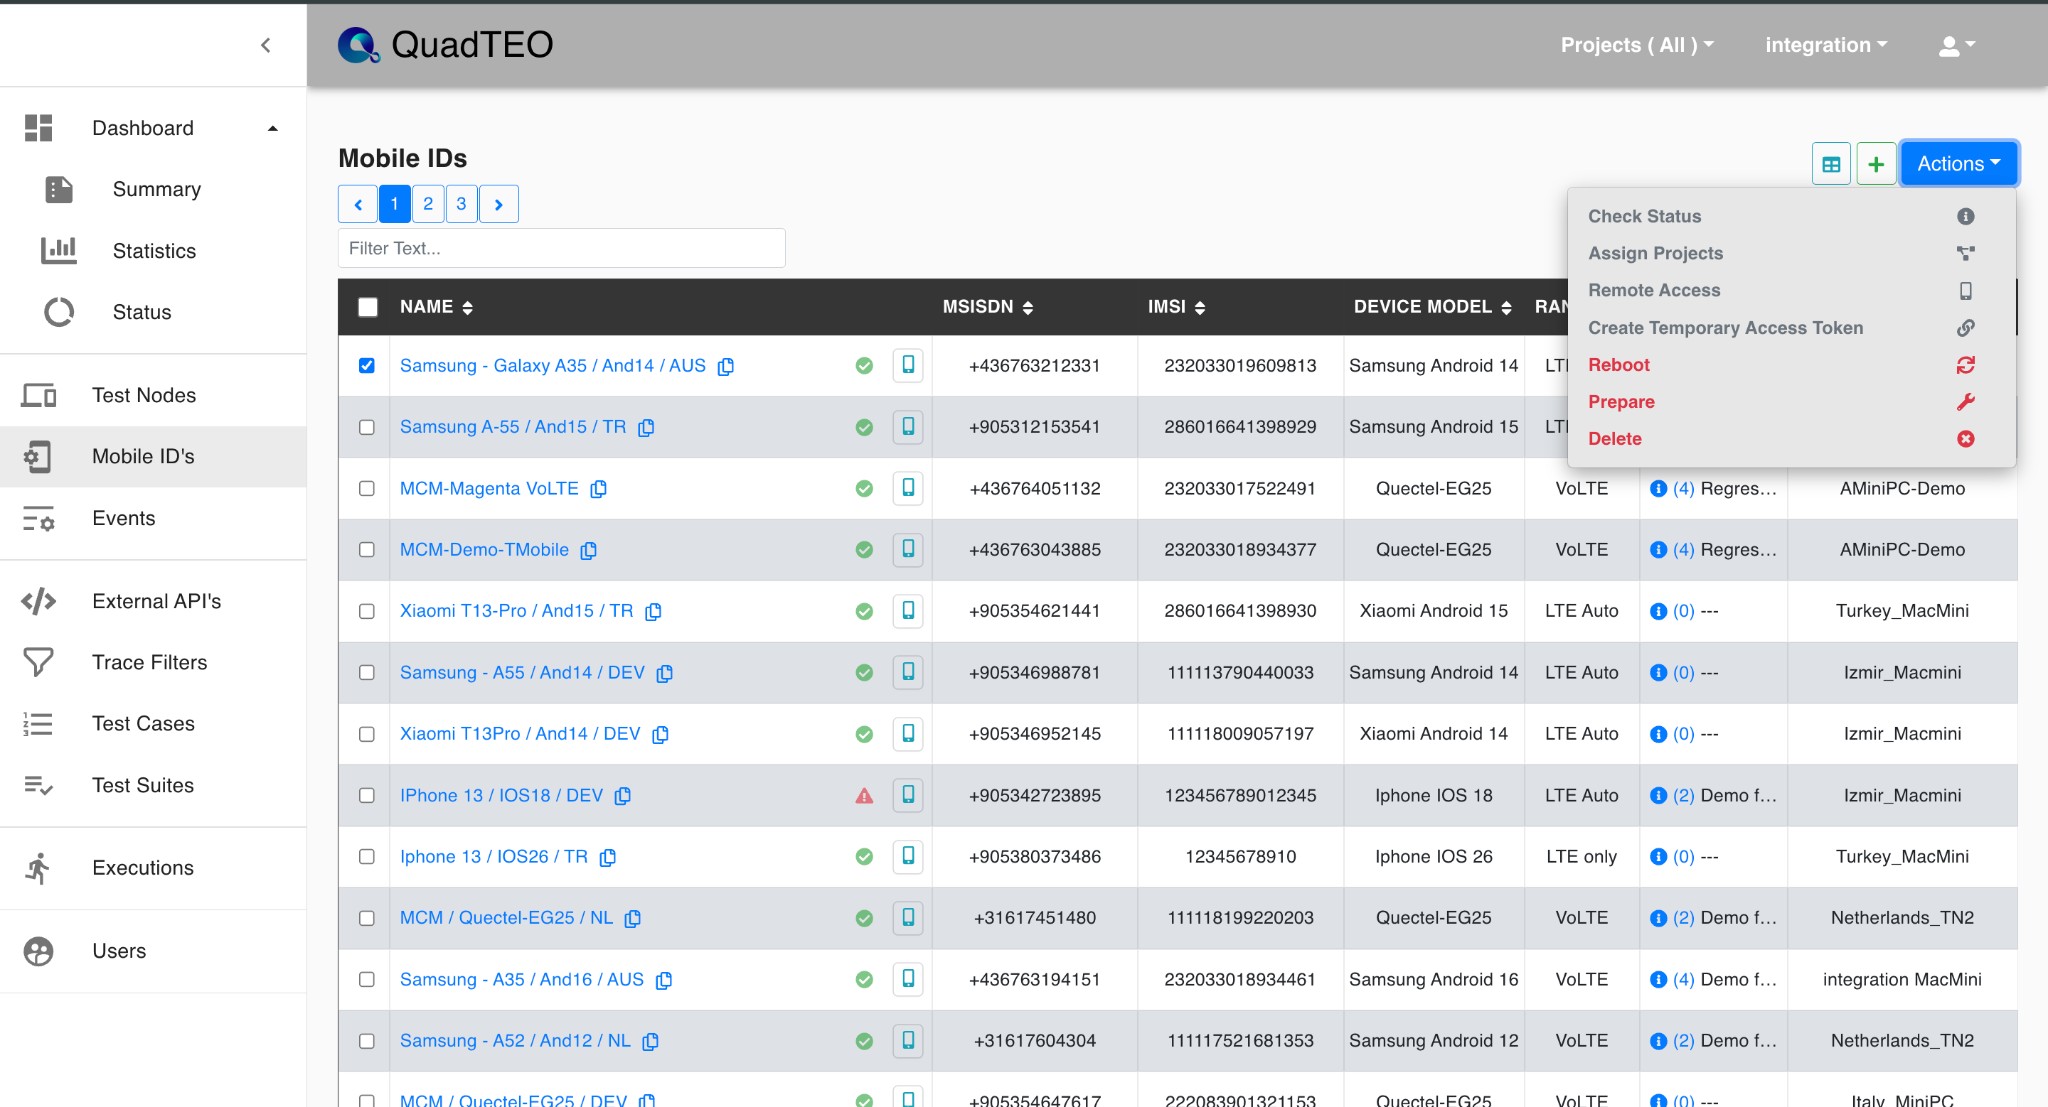
After you run Prepare, TEO applies the required device settings automatically and emails you the result of each step.
Then finish the phone by hand: do the After Prepare items of the checklist at the top of the brand page, and any step the email lists as failed.
If the phone is not visible
- Confirm that the Test Node is online.
- Try a different data-capable USB cable.
- Keep the phone unlocked and reconnect it.
- On Android, check that USB debugging is enabled and the Allow USB debugging prompt was accepted.
- On iPhone, check that Trust was tapped in the Trust This Computer? alert and that Developer Mode is enabled.
- On Xiaomi, confirm that a SIM card is inserted and the Xiaomi account is signed in.
More causes are listed in Setup troubleshooting.
The result email
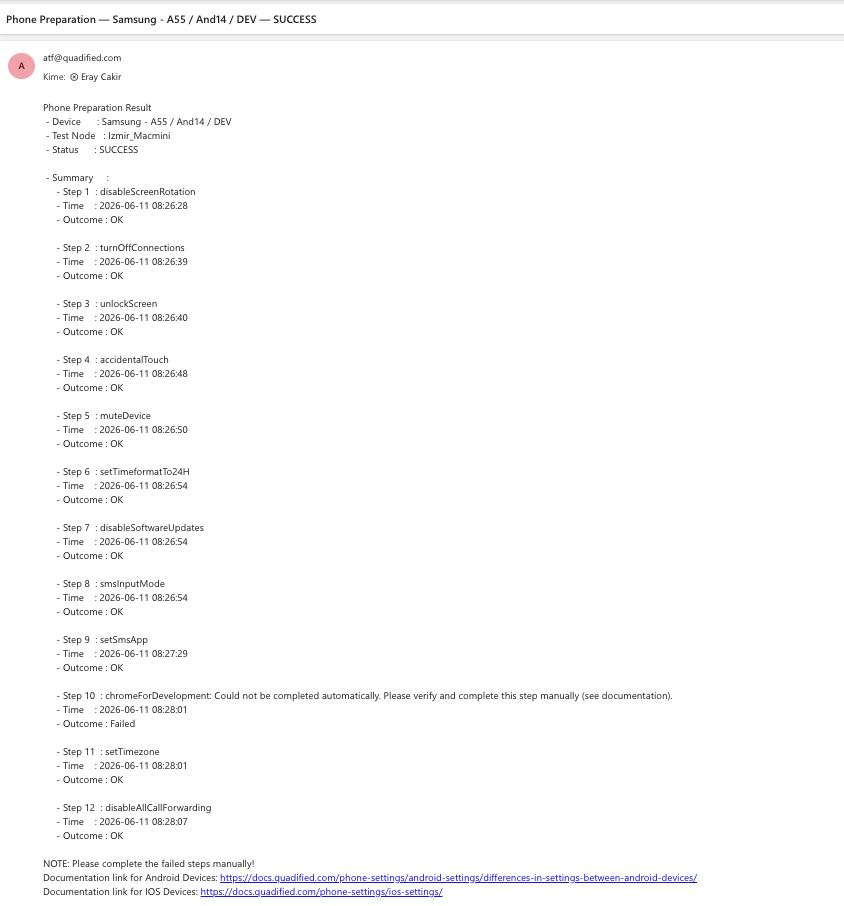
After every Prepare run, TEO sends an email to the email address of the user who started it. The subject is Phone Preparation — device name — SUCCESS or — FAILURE, and the email lists each step with its outcome (OK or Failed).
Complete the failed steps by hand. What Prepare does lists every step, its name in the email and the settings it changes.
Example email:
Delete
The Delete Mobile Id feature allows you to remove a Mobile Id from your system. This is useful for managing and cleaning up your Mobile Id repository.
How to Use the Delete Feature
To delete a Mobile ID, follow these steps:
- Select the Mobile ID to Delete: Choose the Mobile Id that you want to delete from your list.
- Open the Action Dropdown: Click on the ⋮ menu.
- Select "Delete": Choose the "Delete" option and confirm in the Deleting Mobile Id dialog.

Handling Mobile Id in Test Case
If the mobile id you are trying to delete is used by a test case, it cannot be deleted. An error message names the Test Cases that use it ("Deleting … failed! It is used under Test Cases: …"). Remove the device from those Test Cases first.
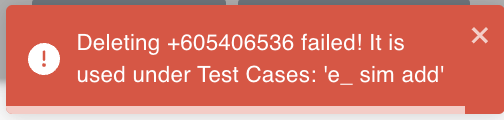
This ensures that you do not accidentally delete mobile ids that are actively being used in test cases, maintaining the integrity of your test plans.