Mac Test Node Setup and Agent Installation
Follow this procedure when a new Mac or Mac mini will be used as a QuadTEO Test Node.
Note
Replace <customer-domain> with the customer environment domain, for example app-integration.
1. Configure Sleep Settings
If the Mac does not already have these settings applied, configure them first. This prevents the machine from going to sleep while the agent is running.
Disable sleep while plugged in:
Disable sleep while on battery:
Disable sleep for both power modes:
These settings keep the Mac awake so the agent can continue running without interruption.
2. Install Xcode
Xcode must be installed before using iOS devices with the Test Node. To download and install Xcode, sign in to the App Store with a valid Apple ID.
- Open App Store.
- Sign in with your Apple ID.
- Search for Xcode.
- Click Install.
3. Complete Initial Xcode Setup
After installing Xcode, open it once and complete the initial setup.
3.1 Accept the Xcode and Apple SDKs Agreement
After installing Xcode, accept the Apple license agreement when prompted.
3.2 Install Required Components
After accepting the agreement, Xcode shows the component selection screen. Continue with macOS selected and click Download & Install.
3.3 Continue Through the Welcome Modal
After the installation is completed, Xcode may show the What's New in Xcode modal. Click Continue to proceed.
4. Verify Command Line Tools
Verify whether Command Line Tools are installed:
If installed, the command should return a path similar to:
If Command Line Tools are not installed, run:
5. Install iOS Platform Support in Xcode
iOS platform support must be downloaded separately inside Xcode. Without it, xcodebuild may not recognize connected iPhones and can fail with exit code 70.
- Open Xcode.
- Go to Settings.
- Open Components or Platforms, depending on the Xcode version.
- Download and install the iOS platform matching the connected device's iOS version.
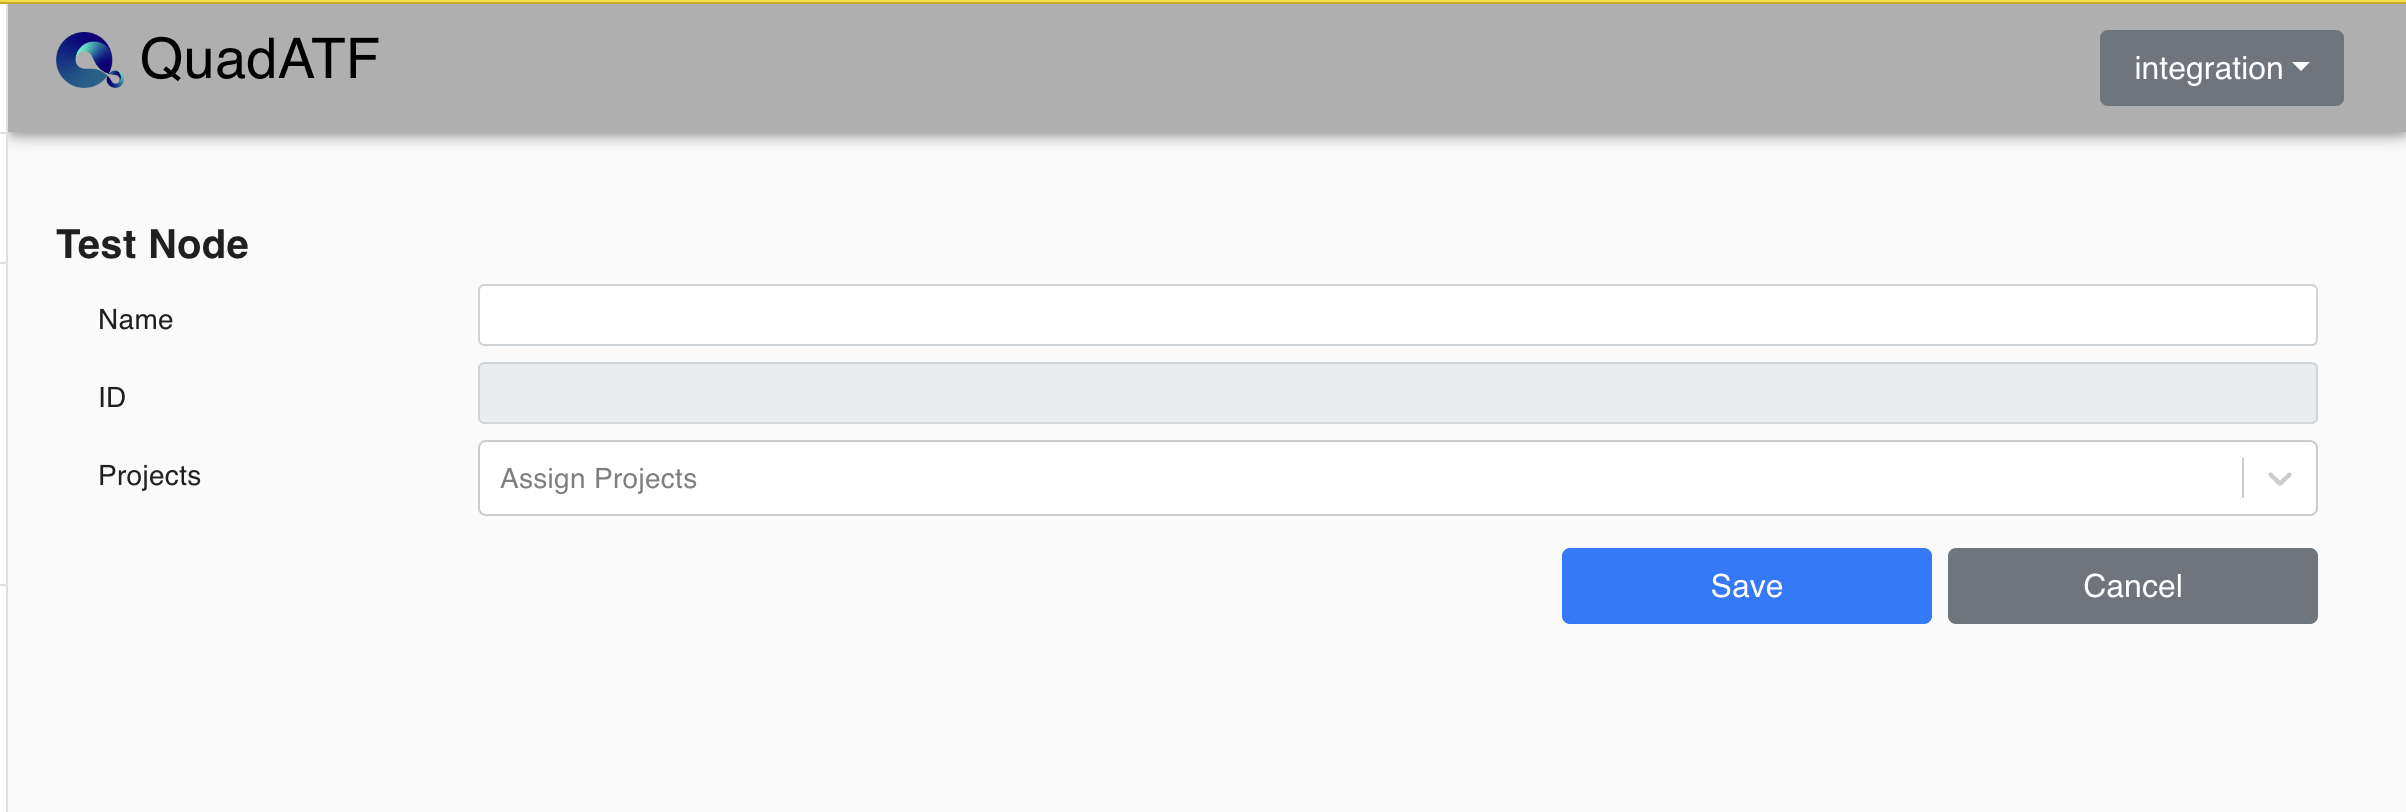
6. Create a Test Node
Go to:
- Open Test Nodes.
- Click the + button.
- Enter a name for the Test Node.
- Assign the required project if needed.
- Click Save.
7. Open the Agent Installer
After the Test Node is created:
- Select the newly created Test Node.
- In the top-right corner of the Test Nodes page, click the three-dot menu.
- Click Agent Installer.
The Agent Installation modal shows a command that must be executed on the Mac mini terminal.
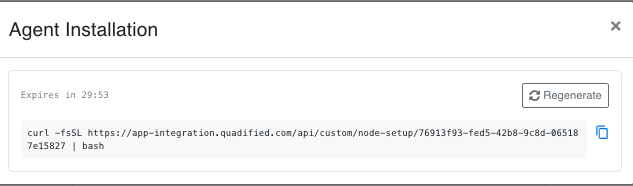
8. Run the Agent Installer Command
Copy the command from the Agent Installation modal and run it on the Mac mini terminal.
The command has the following format:
The installer token expires after the time shown in the modal, for example Expires in 30:00. If the command expires, click Regenerate and run the newly generated command.
9. Start the Agent
After the installer completes, navigate to the agent directory:
Start the agent:
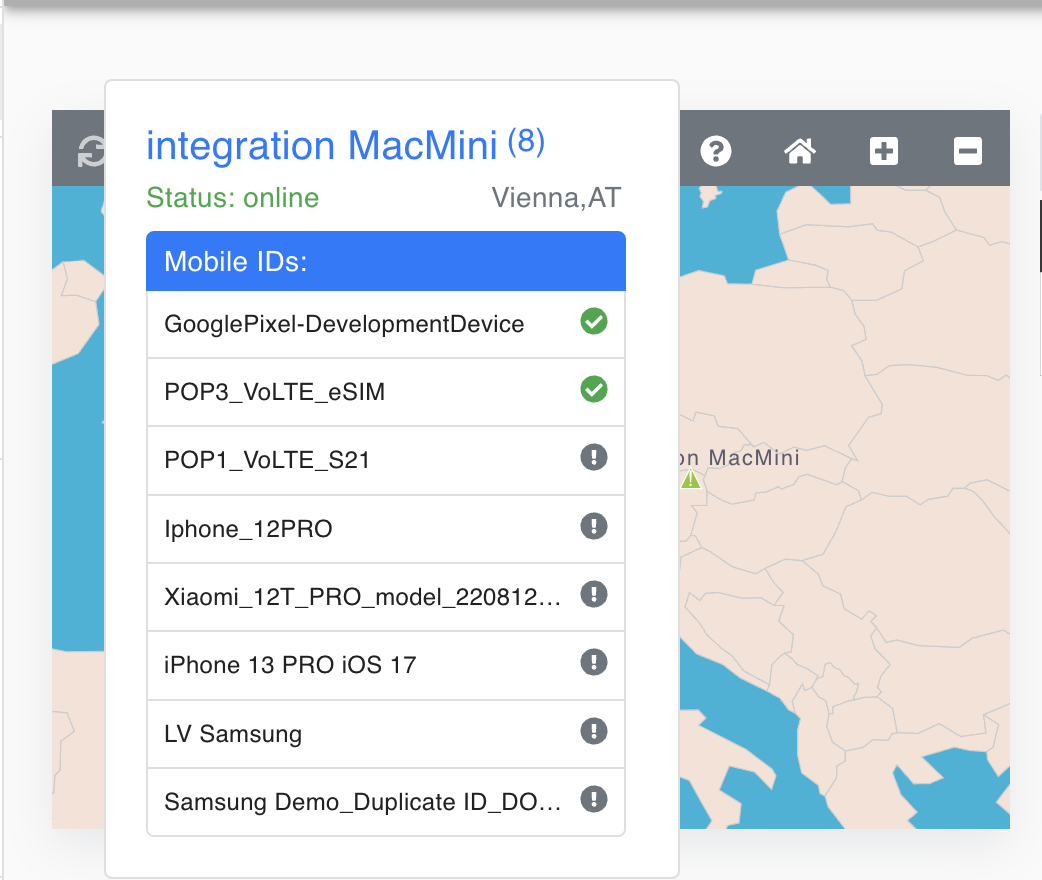
10. Verify Agent Status on the UI
Go to:
On the dashboard map, the Test Node should appear as online.