Creating a New User
To add a new user to the system, follow these steps:
-
Add User Button : Navigate to the Users page and click on the button style="background-color: #14A44D; color: white; border: none; padding: 5px 10px; border-radius: 3px; cursor: pointer;">+ button located at the top right of the page. This will open the "Create New User" dialog.
-
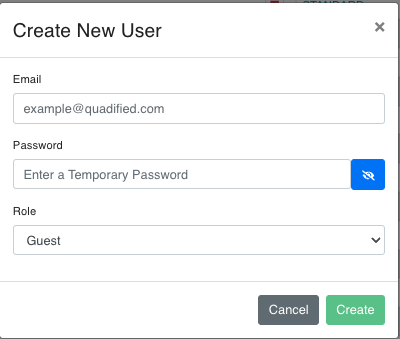
Fill in the user details: In the "Create New User" dialog, you will need to provide the following information:
- Email: Enter the email address of the new user. This should follow the format
example@quadified.com. - Password: Enter a temporary password for the new user. The user will be able to change this password upon their first login. You can click the eye icon to toggle visibility of the password.
- Role: Select the role for the new user from the dropdown menu. The available roles are:
- Guest
- Standard
- Admin
- Email: Enter the email address of the new user. This should follow the format
-
Save the new user: Once all the details are filled in, click the "Create" button to add the new user to the system. If you want to cancel the operation, click the "Cancel" button.