Trace Verification
Below steps should be followed to do Trace Verification:
- Run the Test Case that the Trace Filter has been added via a Test Suite.
- During the test case execution, the TEO backend will register a trace session for this test case execution, which can be retrieved via an API call as below:
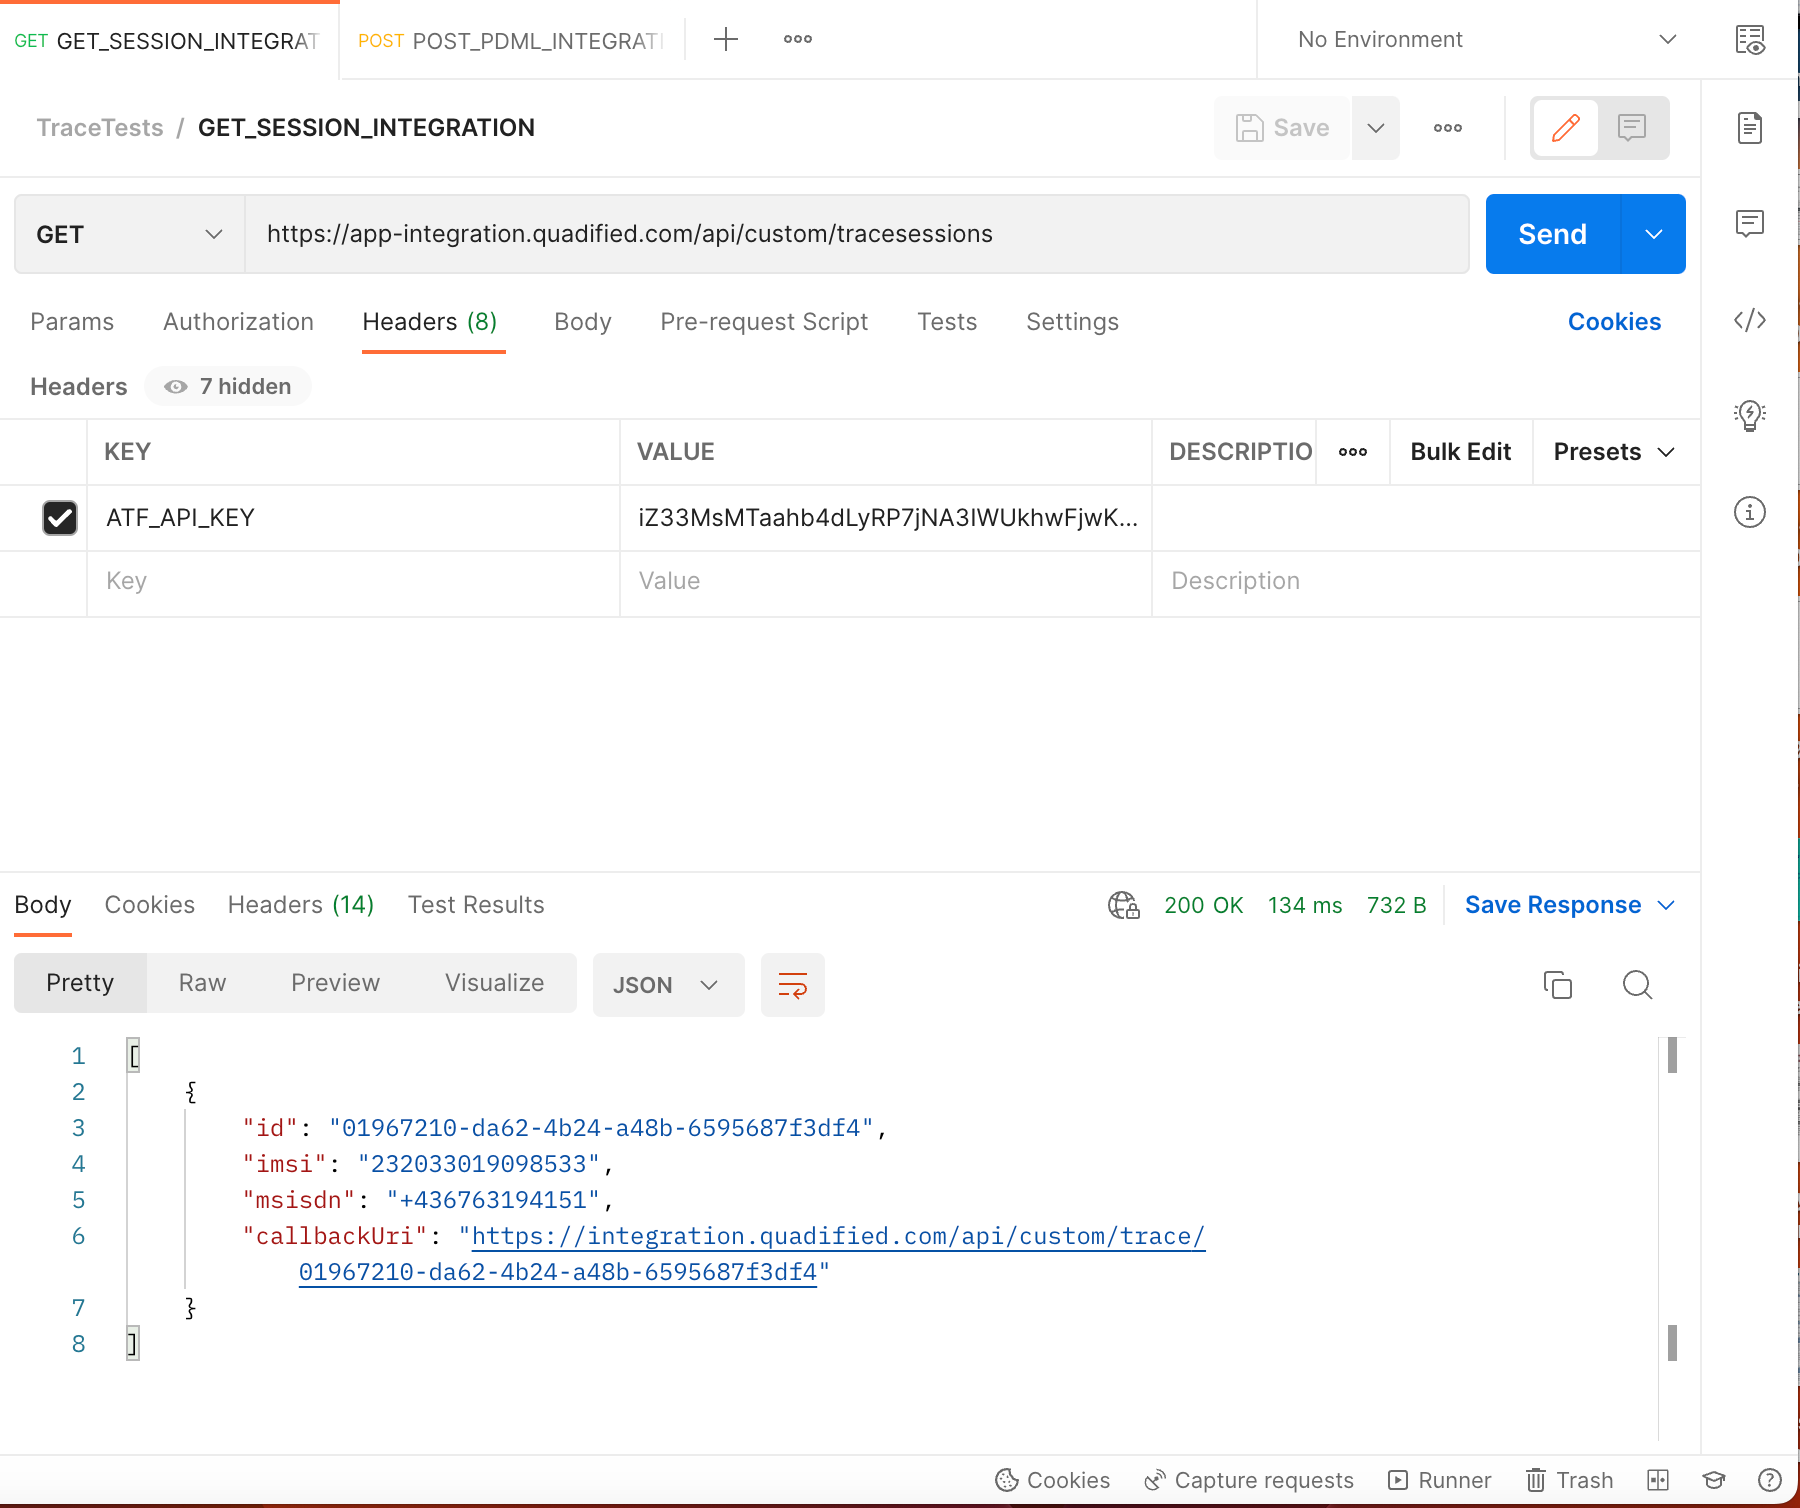
NOTE: Note that the API Key created before should be added to the Request headers with the “ATF_API_KEY“ key name as seen in the screenshot.
NOTE: Note that the URL in the API endpoint should be adapted according to the TEO site. The exact URL to be used can be obtained by downloading the agent-settings from the Test Nodes page in TEO UI. In the downloaded file “atfServerUrl“ is the URL to be used in the API request.
-
The API call above returns a JSON array as seen in the screenshot. It will contain all active trace sessions. If there are multiple running test cases with trace enabled, then there should be a separate trace session per the IMSI involved in each filter in the running test cases.
-
Now, as a last step, we should upload the PDML file created before.
- Once there is an active session, the Trace Server will be posting (HTTP POST) trace packets (as PDML files) to the given
callbackUri. -
The below steps are just a simulation of this process.
-
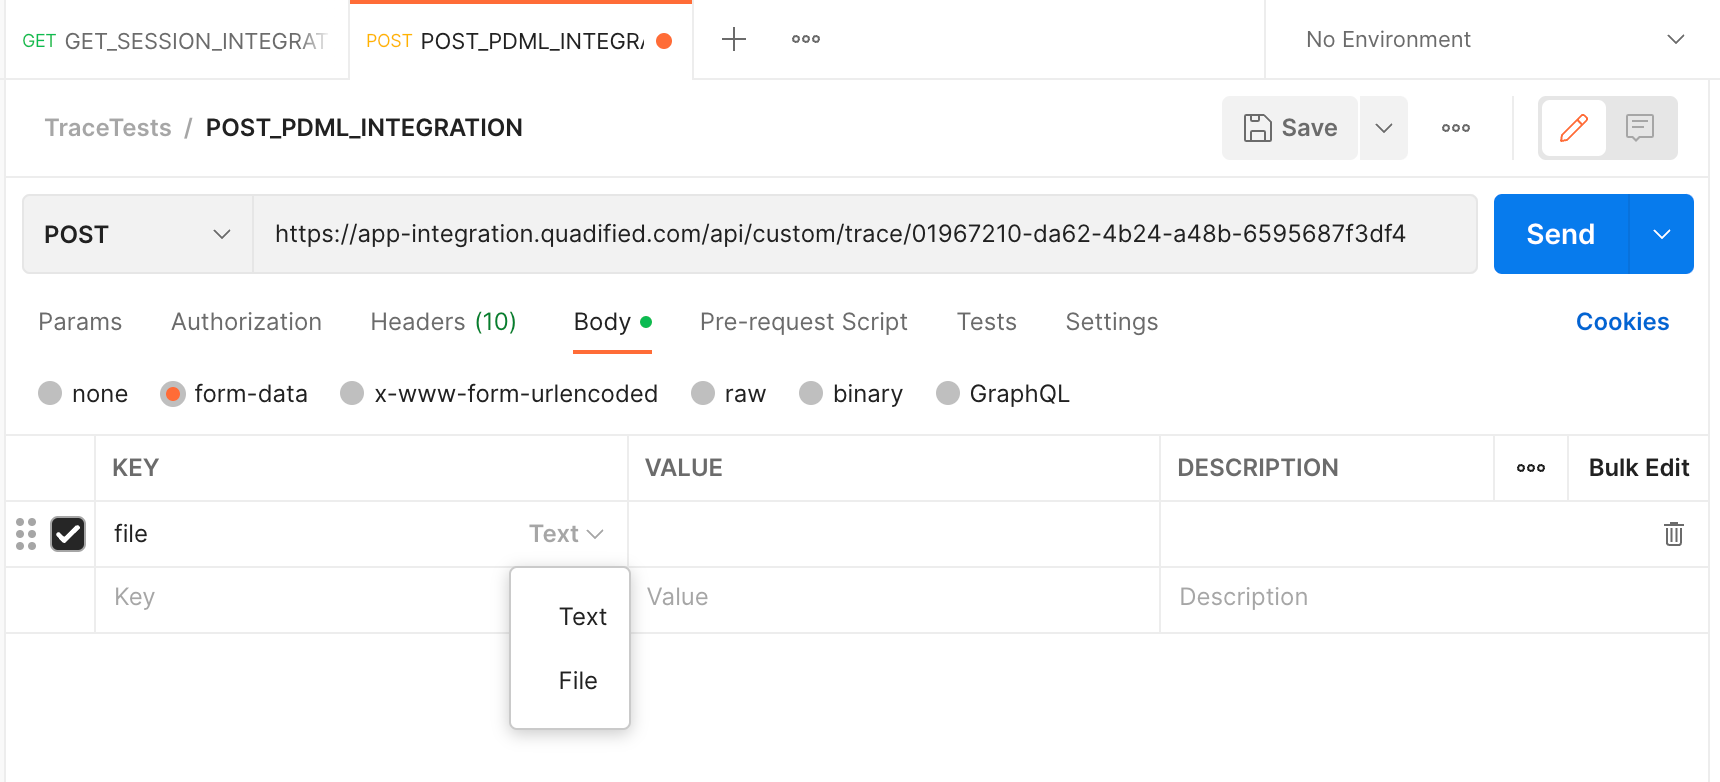
Enter the correct URL returned from the previous HTTP GET call and make sure to select
POSTas this will be HTTP POST. And selectform-dataand writefilein the Key column, and selectFilefrom the drop-down, which appears when hovering over that area with the mouse.
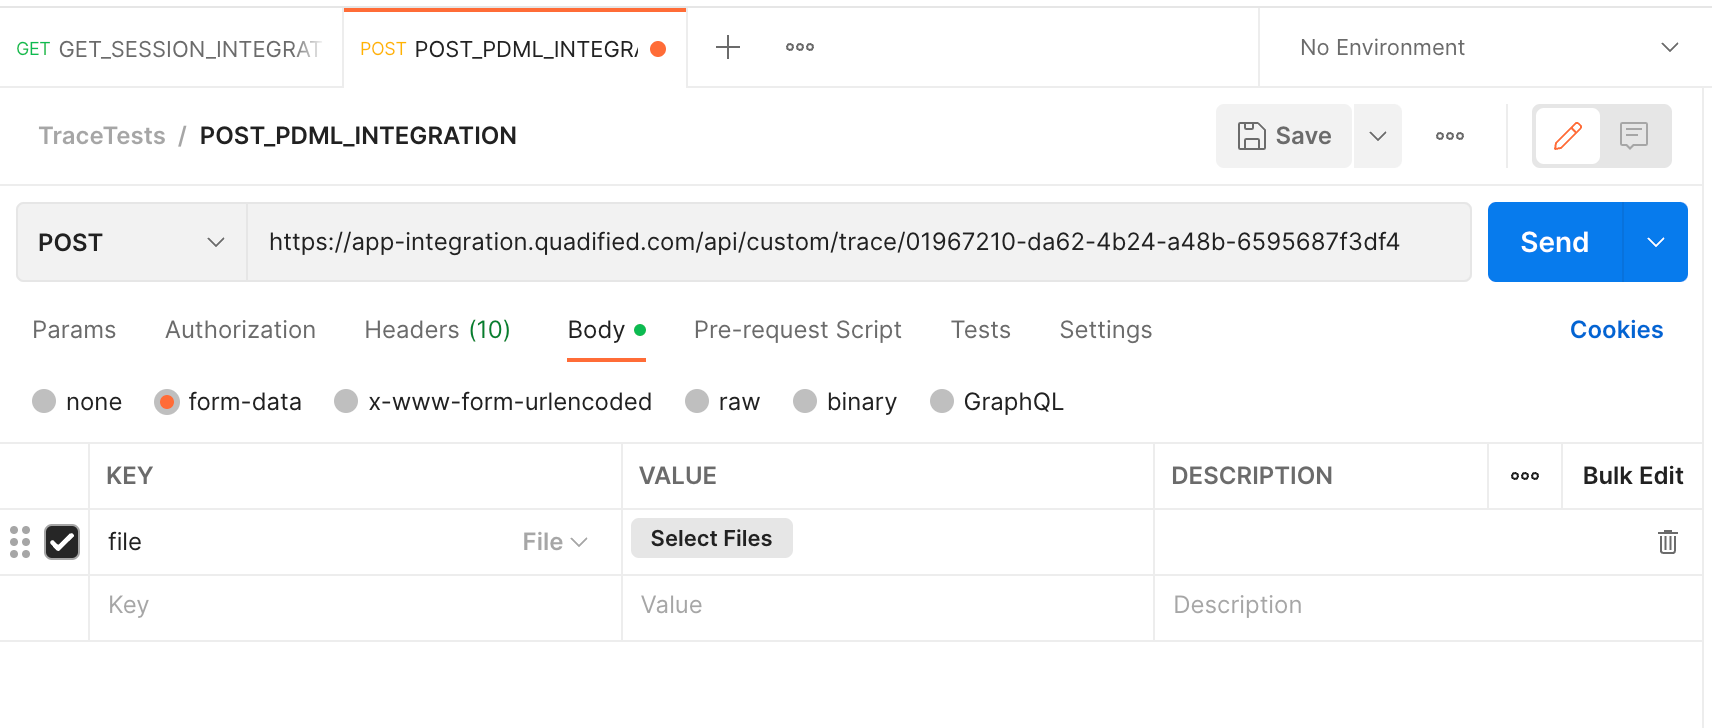
Once the Fileoption is selected, the Select Files button appears, from which the PDML file created before should be selected.
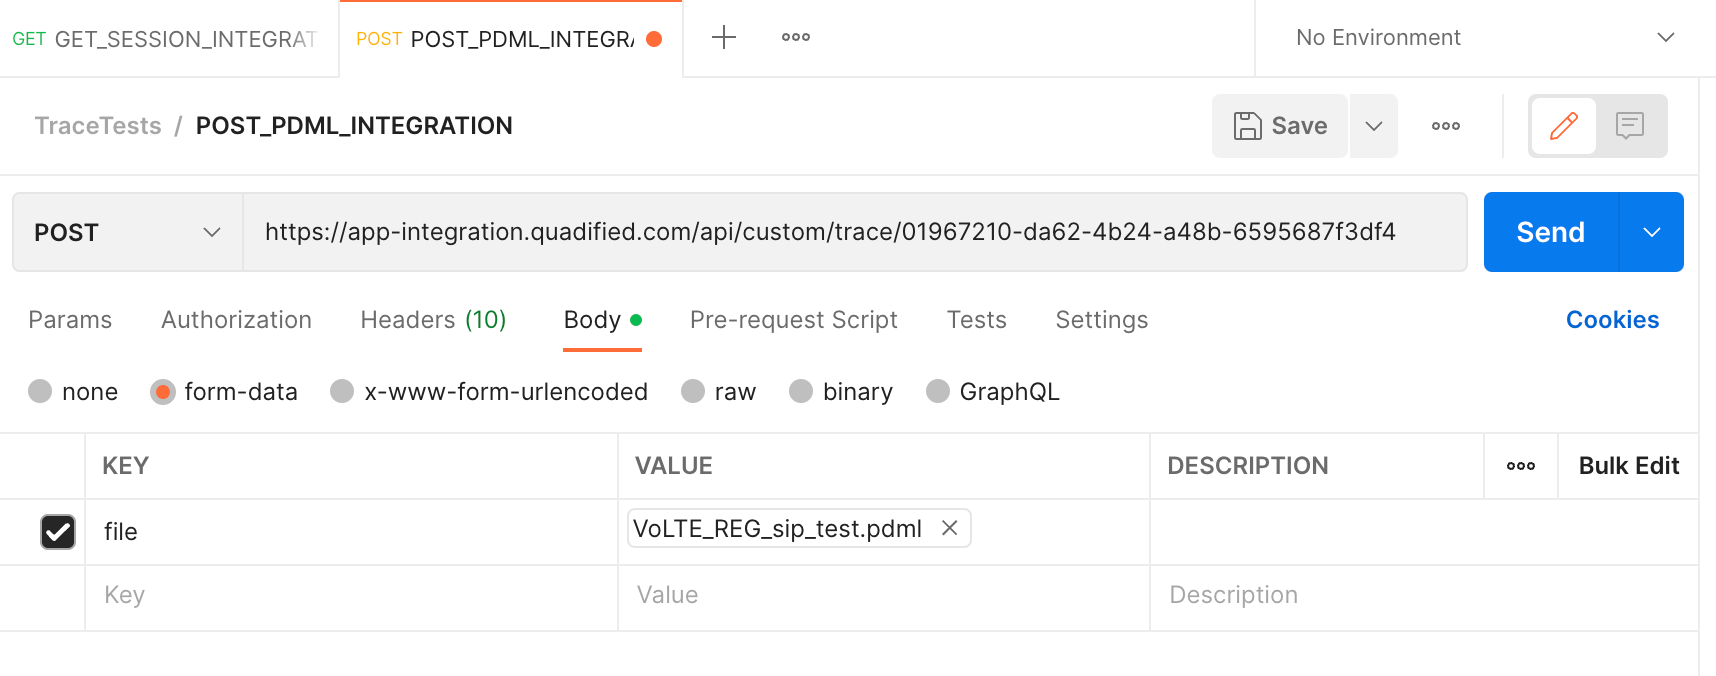
Once the file is also selected, click Send.
If all goes well, the response for the upload should be like below:
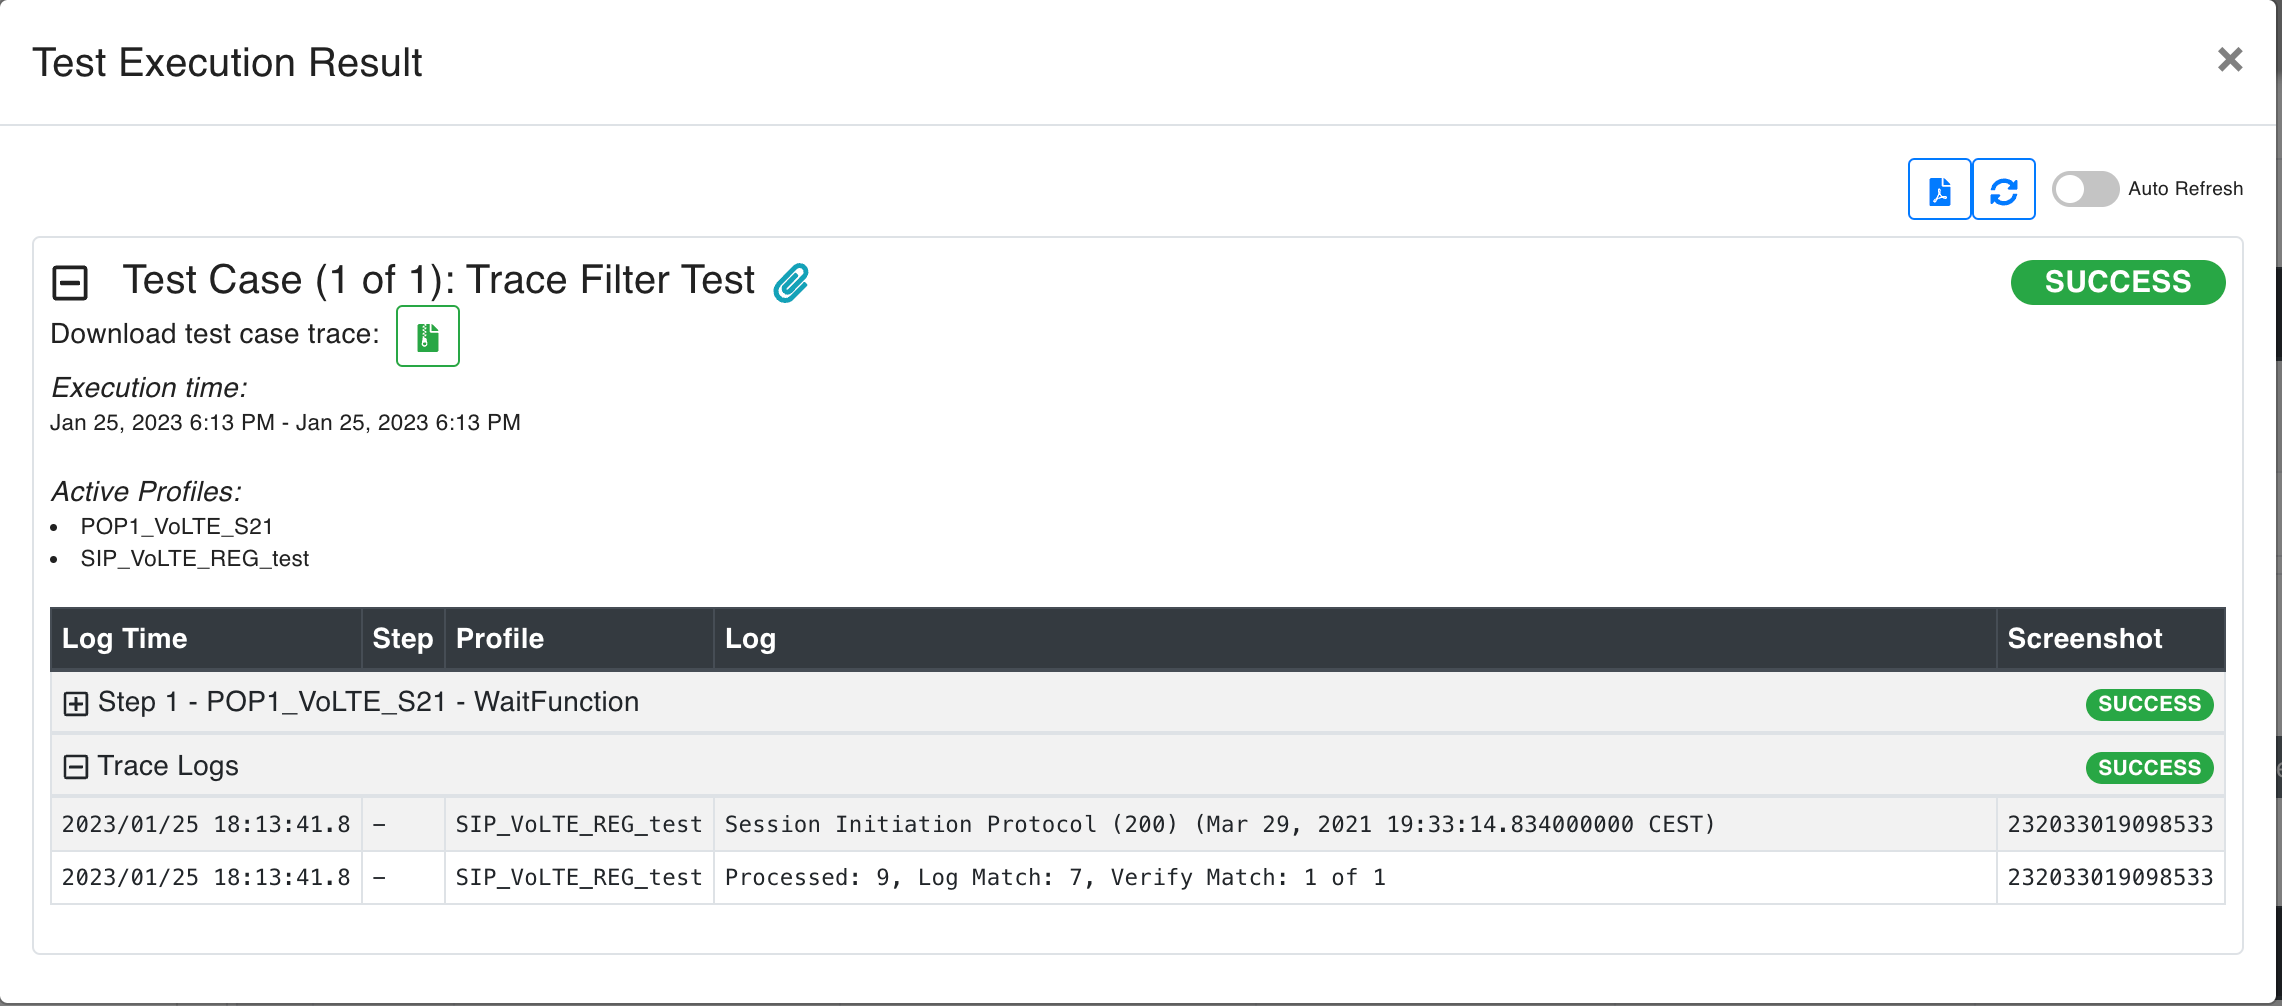
After the test execution is finished, the matched logs can be checked from the Test Case Execution Result page. Also, the trace logs can be downloaded from this page. Below is an example screenshot:
NOTE: Note that the session will be active while the Test Case is running, and will be removed afterwards. Hence the upload needs to happen while it is running.
NOTE: Note that the API Key created before should be added to the Request headers with the “ATF_API_KEY“ key name as seen in the screenshot.
NOTE: Note that the URL in the API endpoint should be adapted according to the TEO site. The exact URL to be used can be obtained by downloading the agent-settings from the Test Nodes page in TEO UI. In the downloaded file “atfServerUrl“ is the URL to be used in the API request